AnimalBuster Part 3 - Create Enemy and Buildings
Overview
You will build an interactive VR shooting game using XRCC in this tutorial. Please go through Animal Buster part 1 and part 2 before this tutorial.
Step 1: Spawn the Enemy
- Open the Asset Panel:
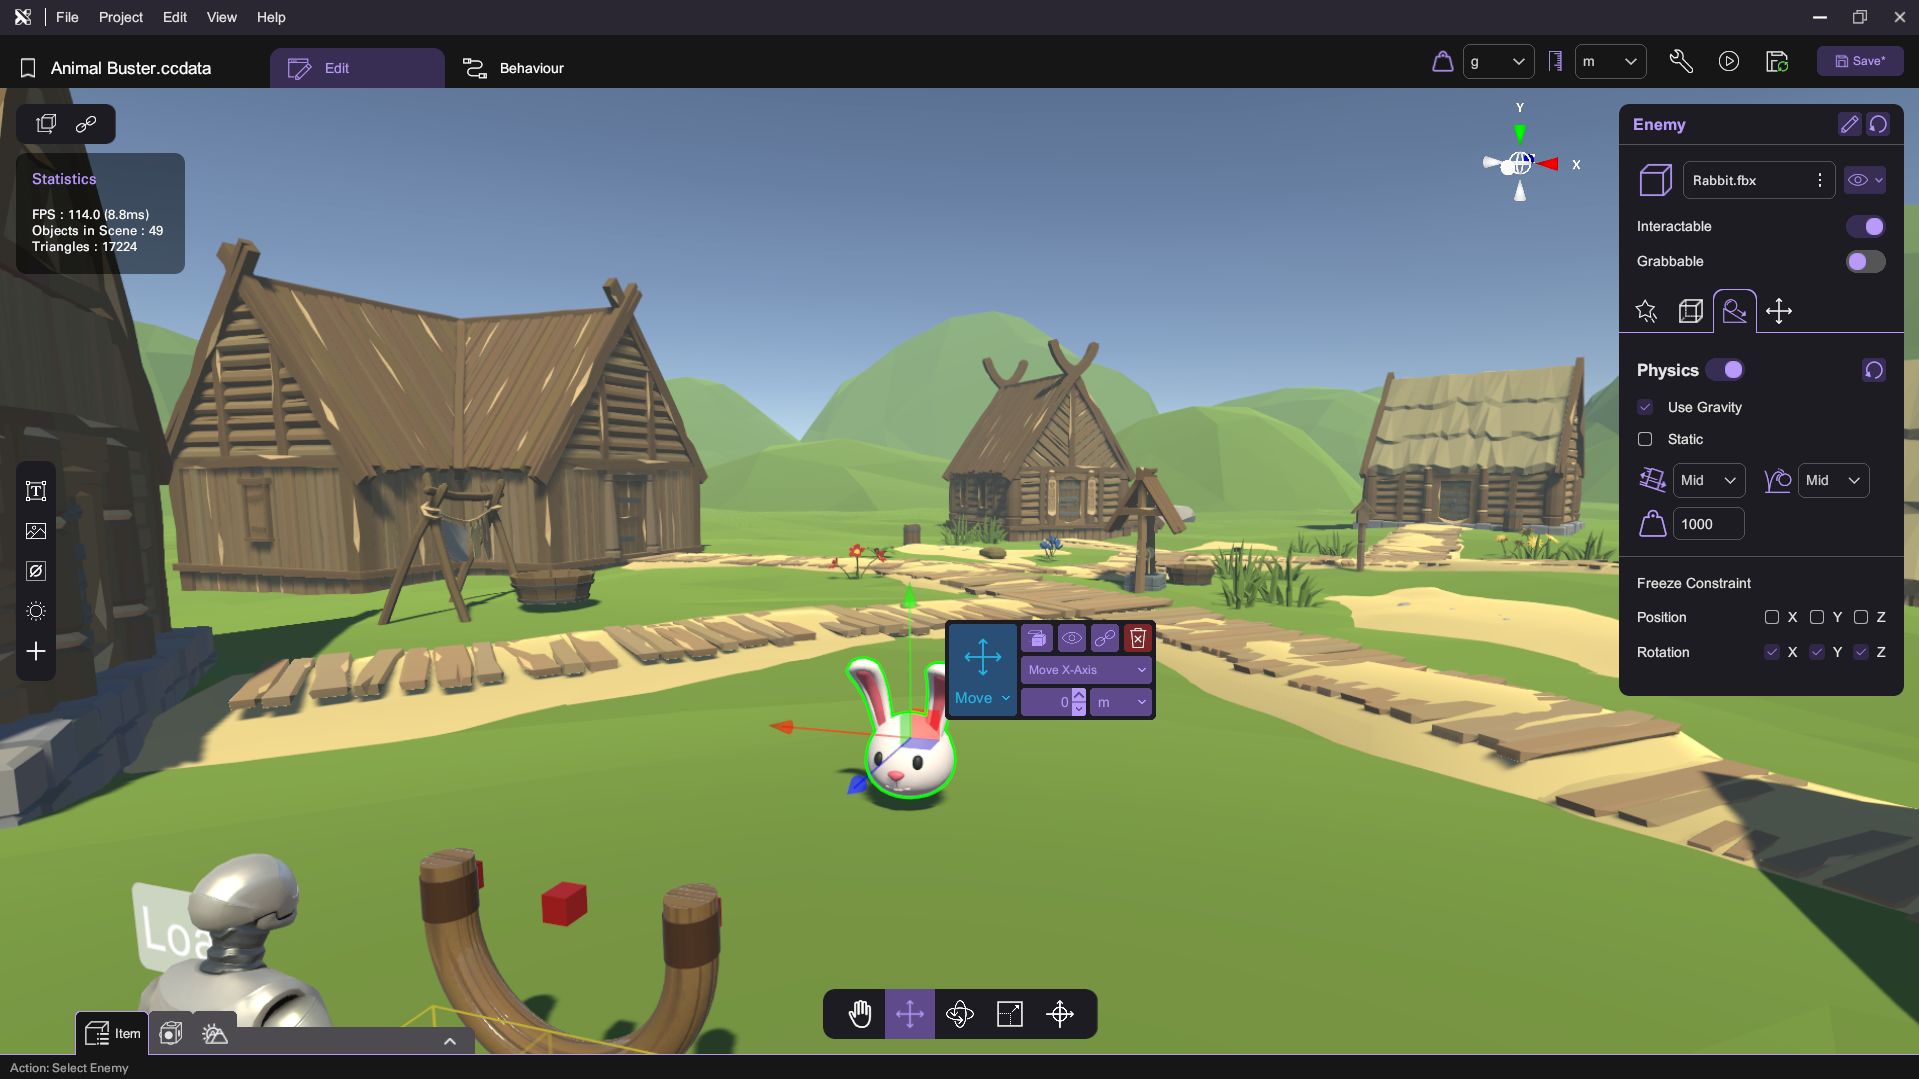
- Spawn a rabbit model and rename it to Enemy.
- Set Enemy Attributes:
- Enable the following attributes:
- Interactable
- Physics
- Use Gravity
- Freeze the rotation.
- Set the scale to 2, 2, 2.
- Enable the following attributes:
Step 2: Define Enemy Variables
- Switch to the Behavior Tab:
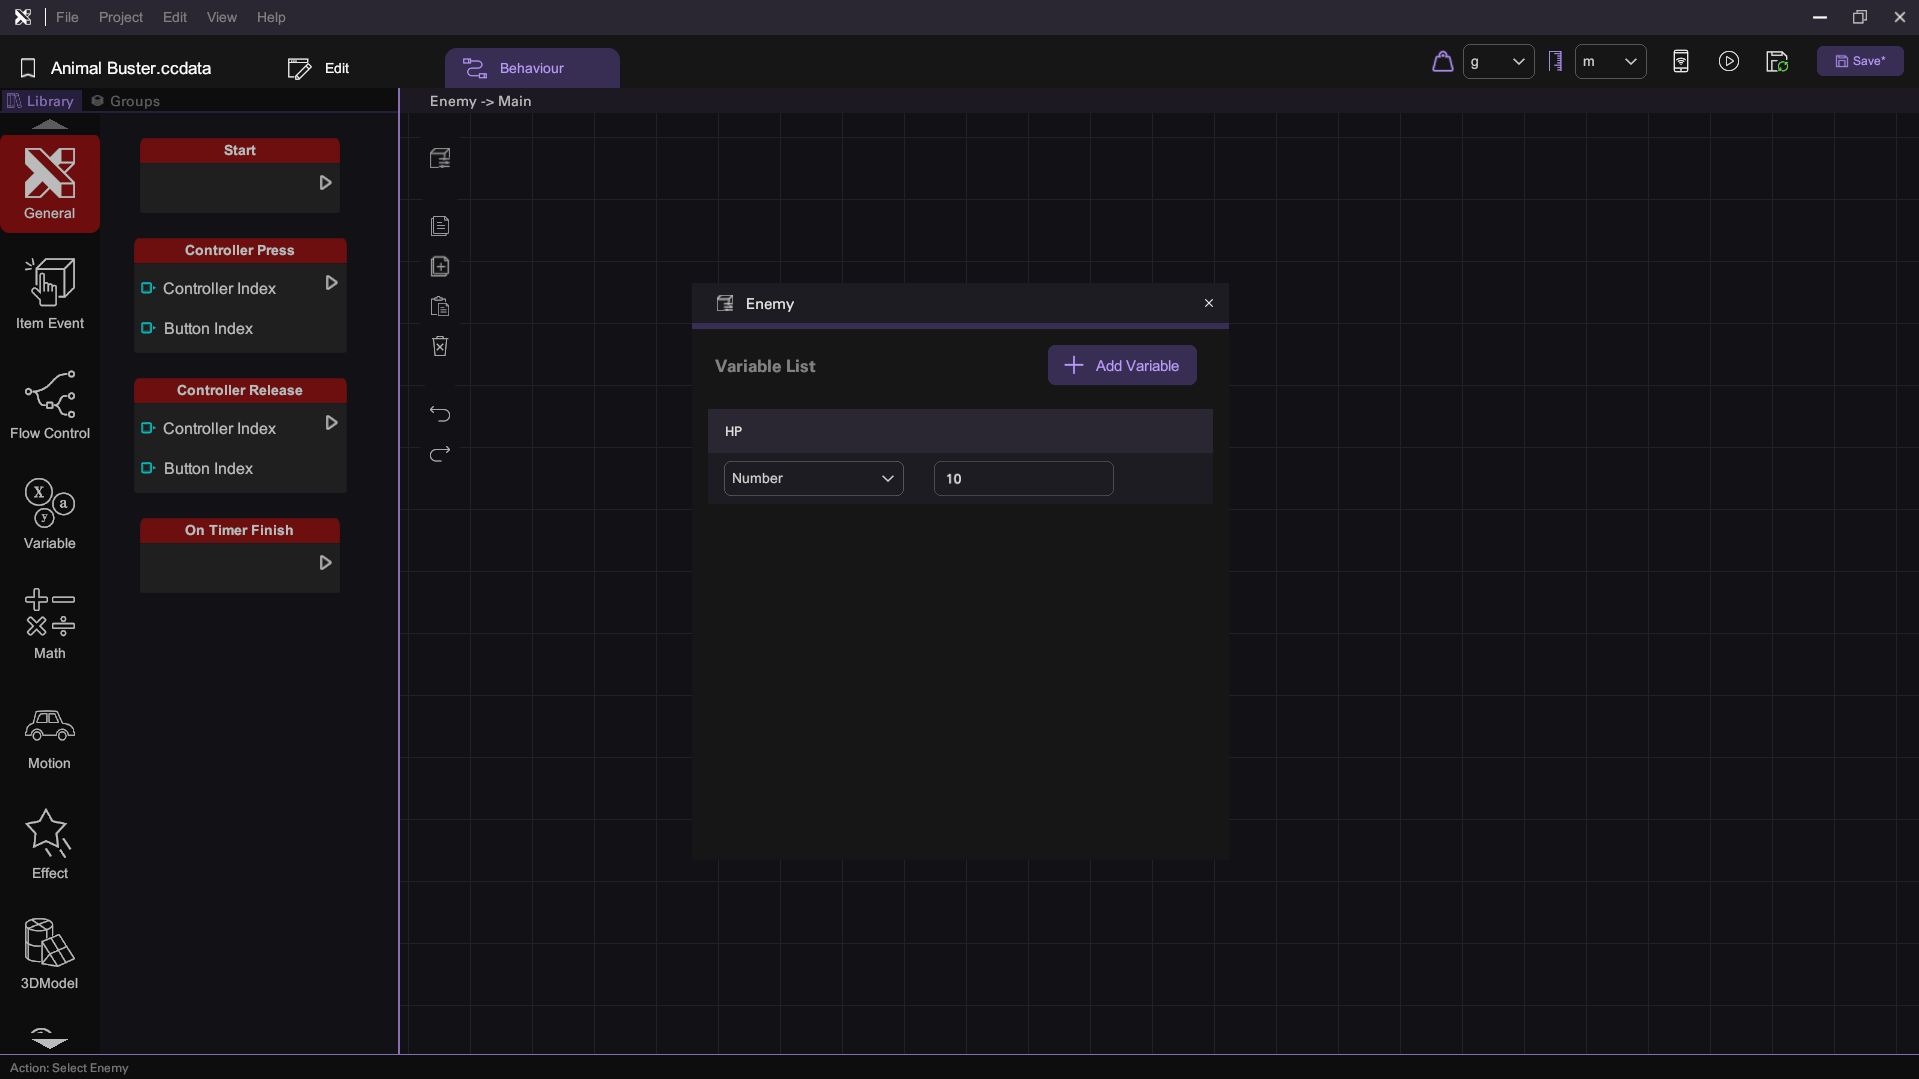
- Open the Variable Panel.
- Create HP Variable:
- Define a number variable named HP with a default value of 10.
Step 3: Create Take Damage Action
- Define the Action:
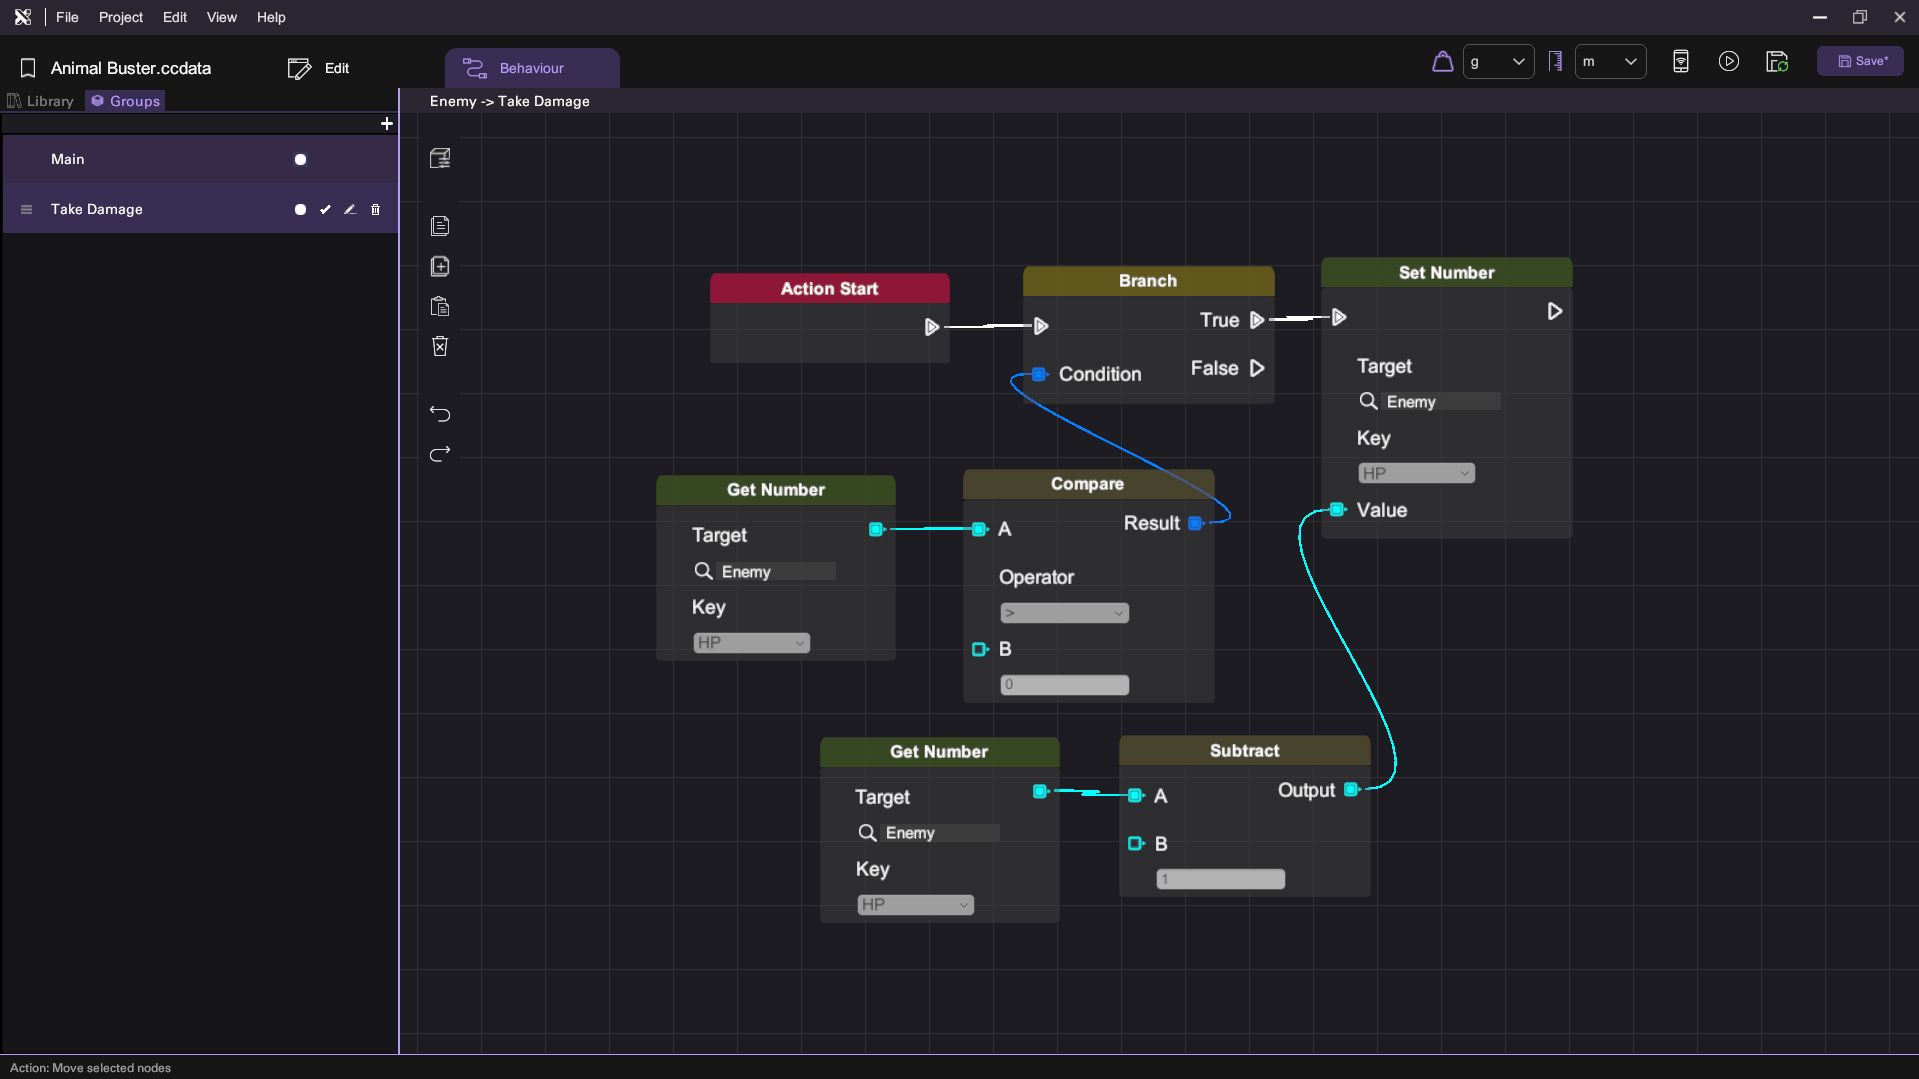
- Create an action named Take Damage.
- Setup Damage Logic:
- Drag the following nodes to check if HP is 0 or above:
- Branch node (from Flow Control section)
- Get Number node (from Variable section)
- Compare node (from Math section)
- Then, drag the following nodes to subtract HP by 1:
- Set Number node (from Variable section)
- Get Number node (from Variable section)
- Subtract node (from Math section)
- Drag the following nodes to check if HP is 0 or above:
Step 4: Create the Building
- Return to the Edit Tab:
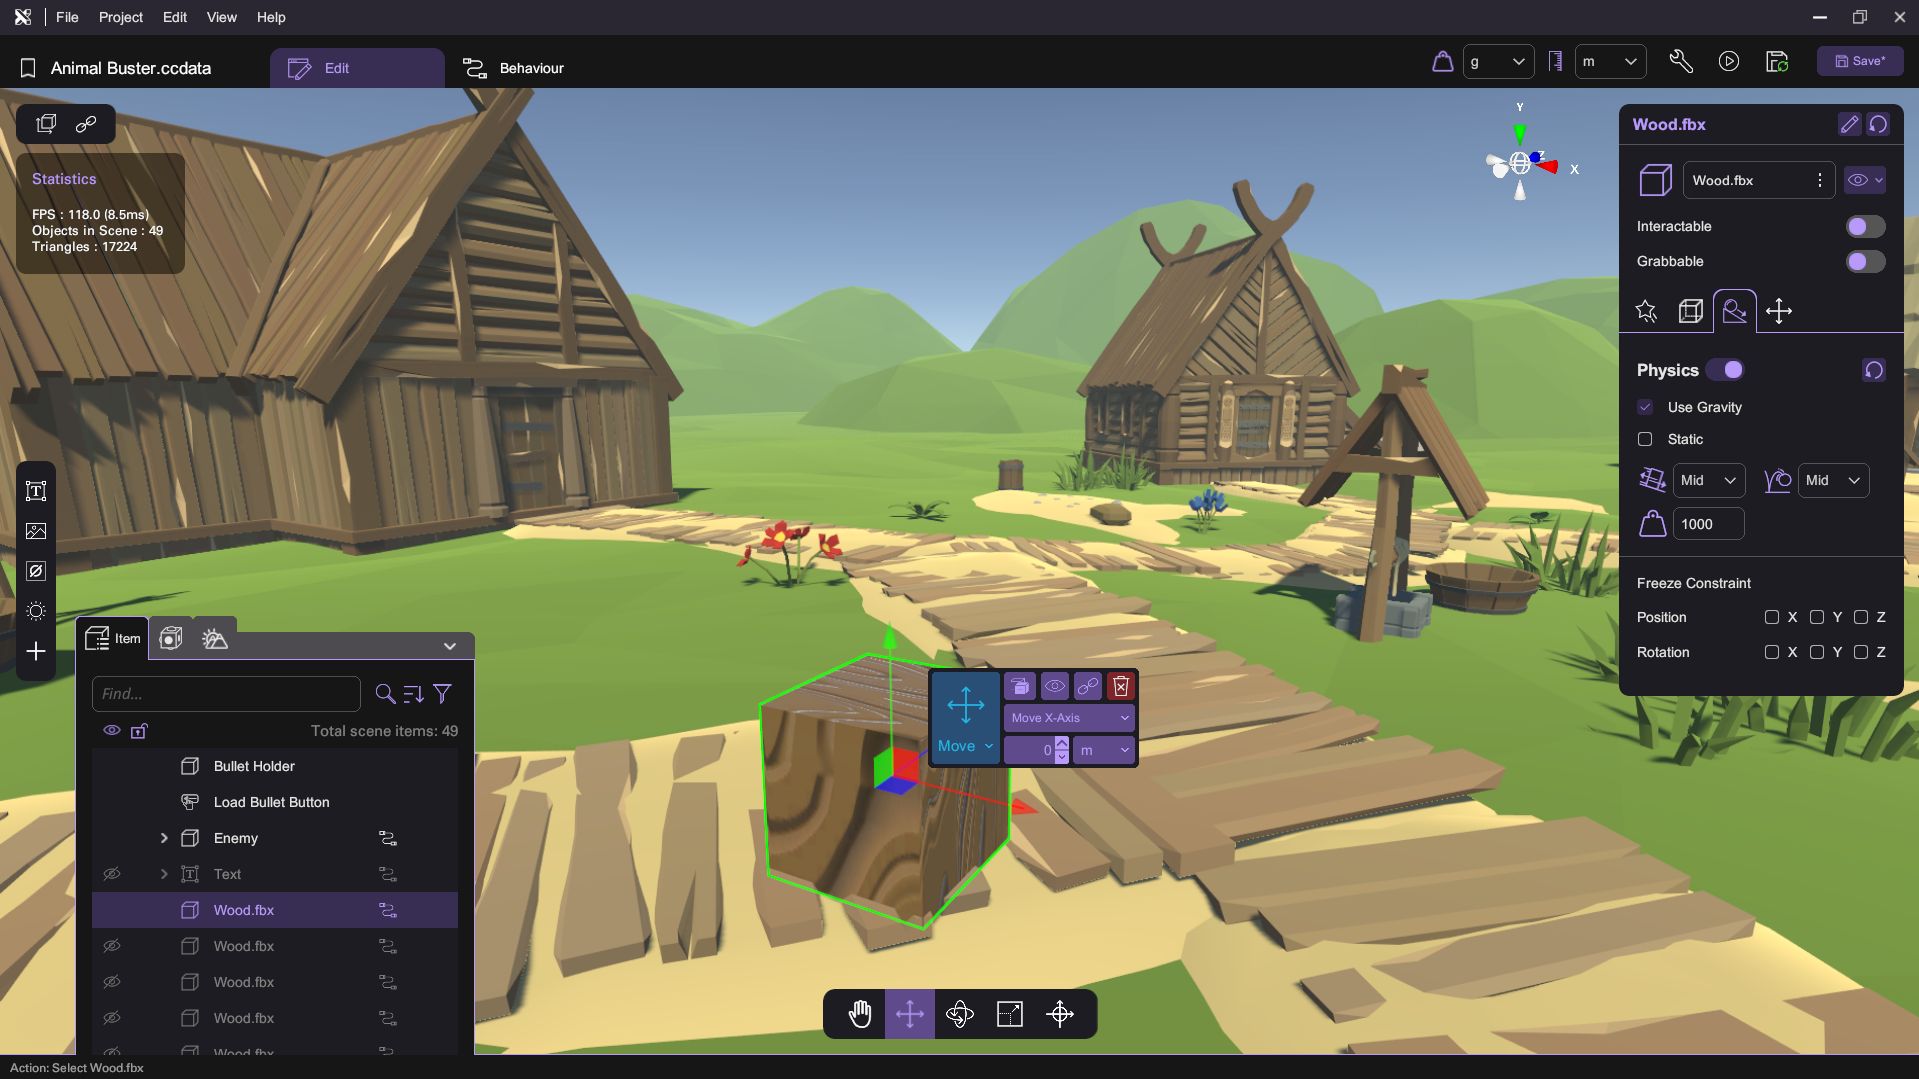
- Spawn a wood in the Asset Panel.
- Set Building Attributes:
- Enable the following attributes:
- Physics
- Use Gravity
- Enable the following attributes:
Step 5: Setup Building Behavior
- Go to Wood's Behavior:
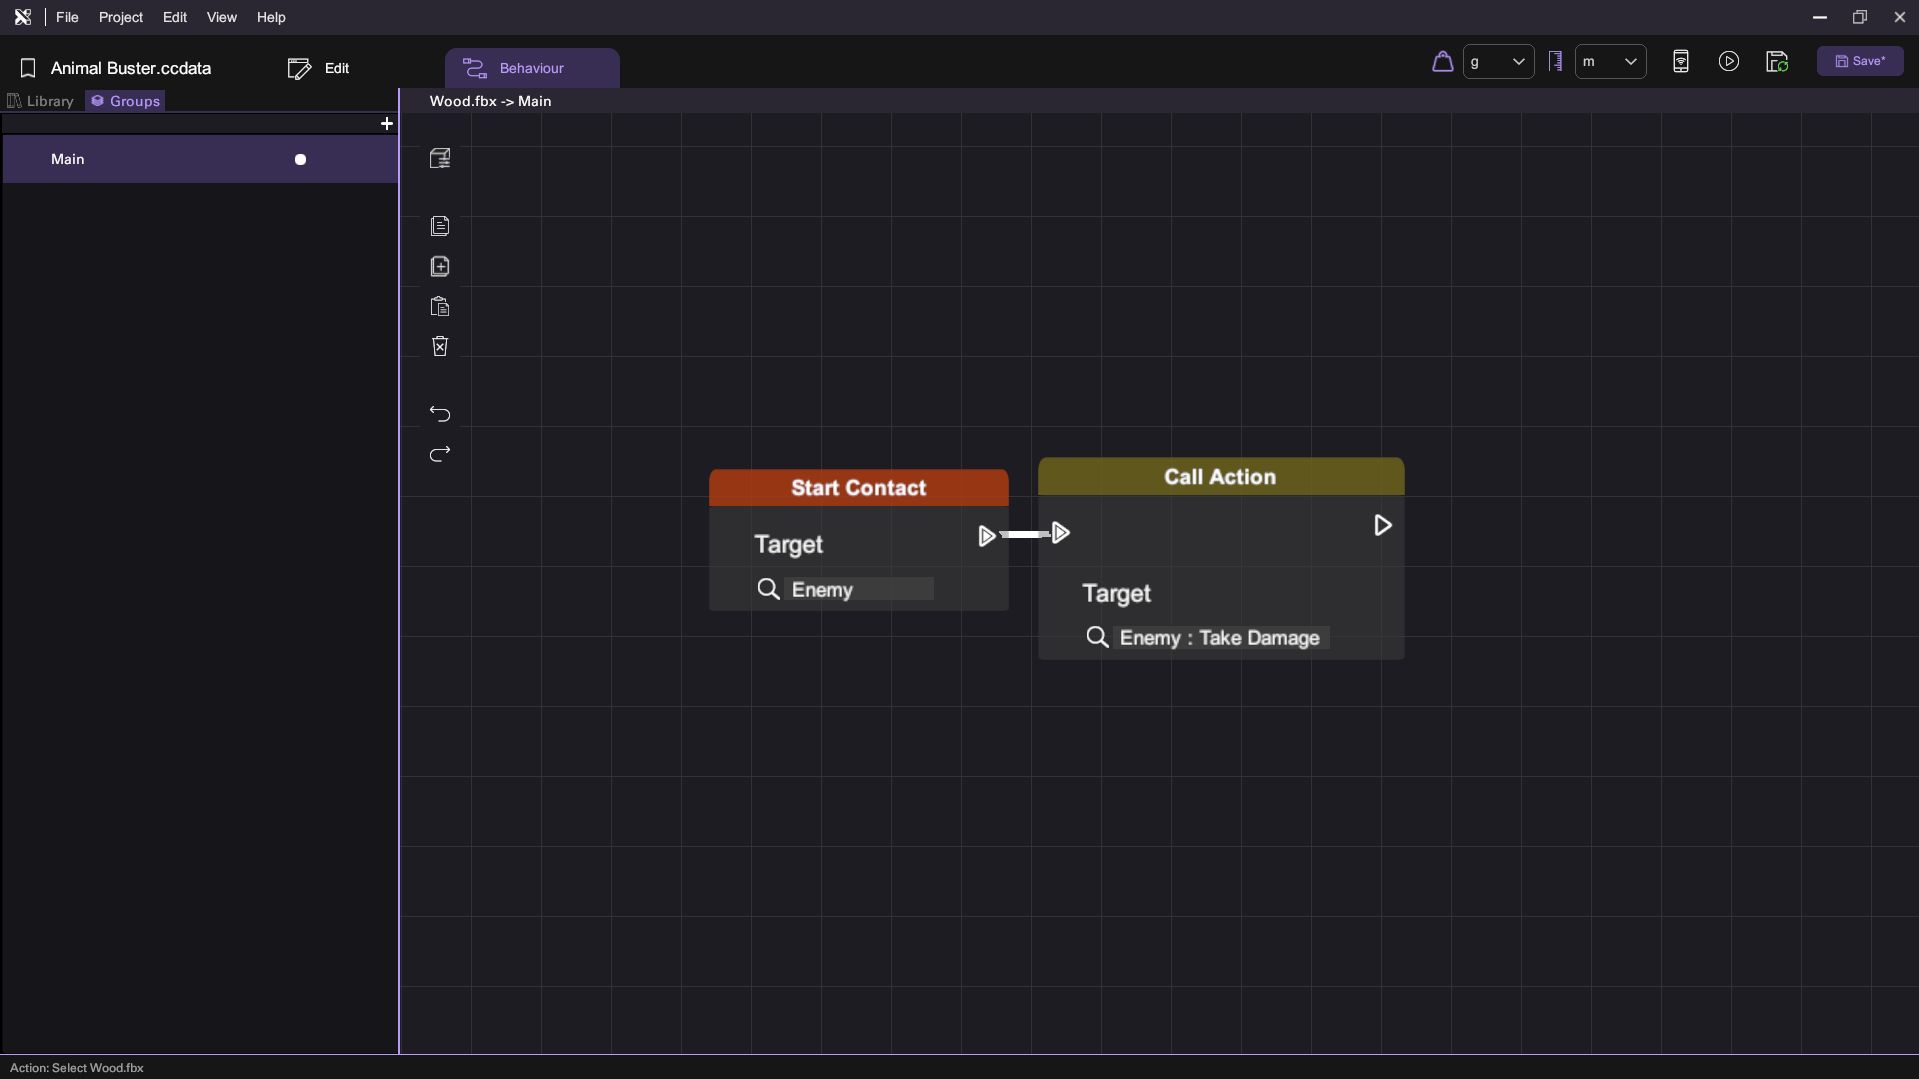
- Drag the following nodes:
- Start Contact node (from Item Event section)
- Call Action node (from Flow Control section)
- This setup will call the Take Damage action when the wood contacts the enemy.
- Drag the following nodes:
Step 6: Duplicate the Wood
- Return to the Edit Tab:
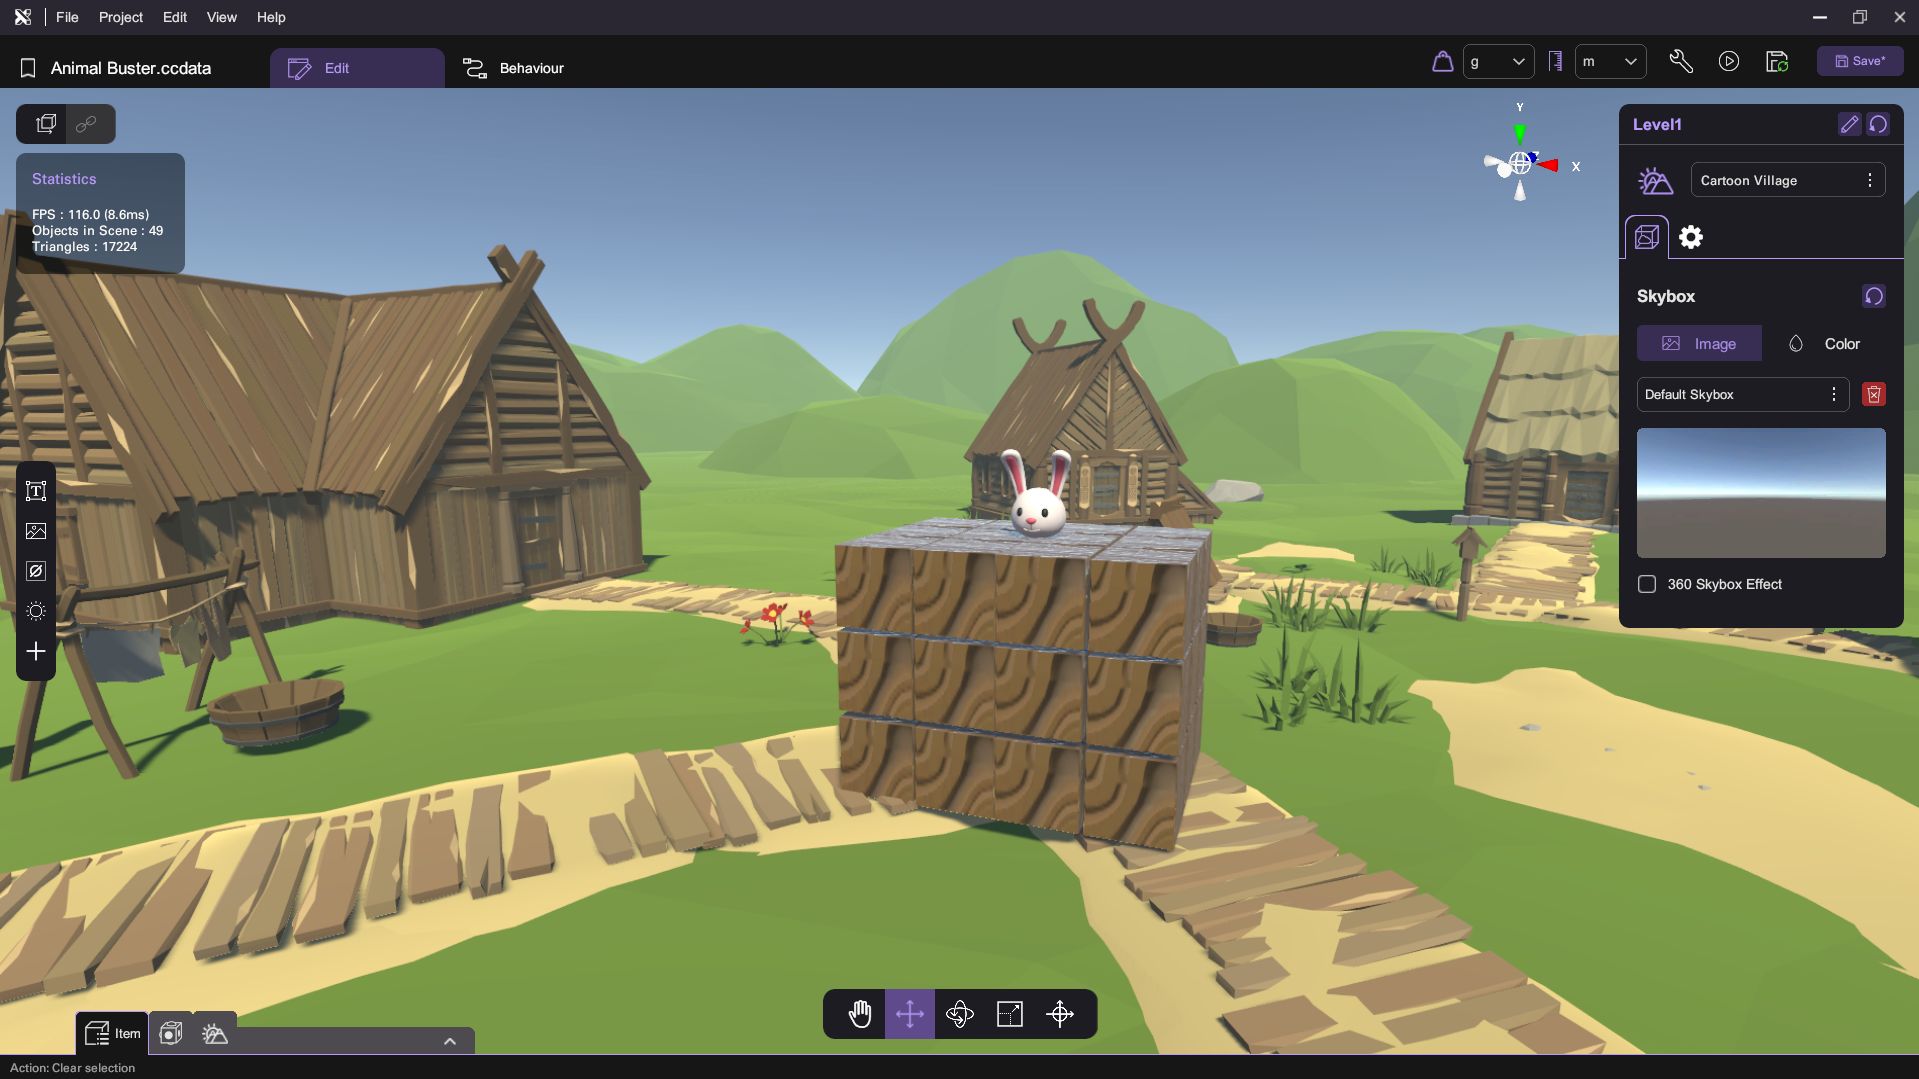
- Duplicate the wood object to build your game scene.
Step 7: Copy Behavior to Bullet
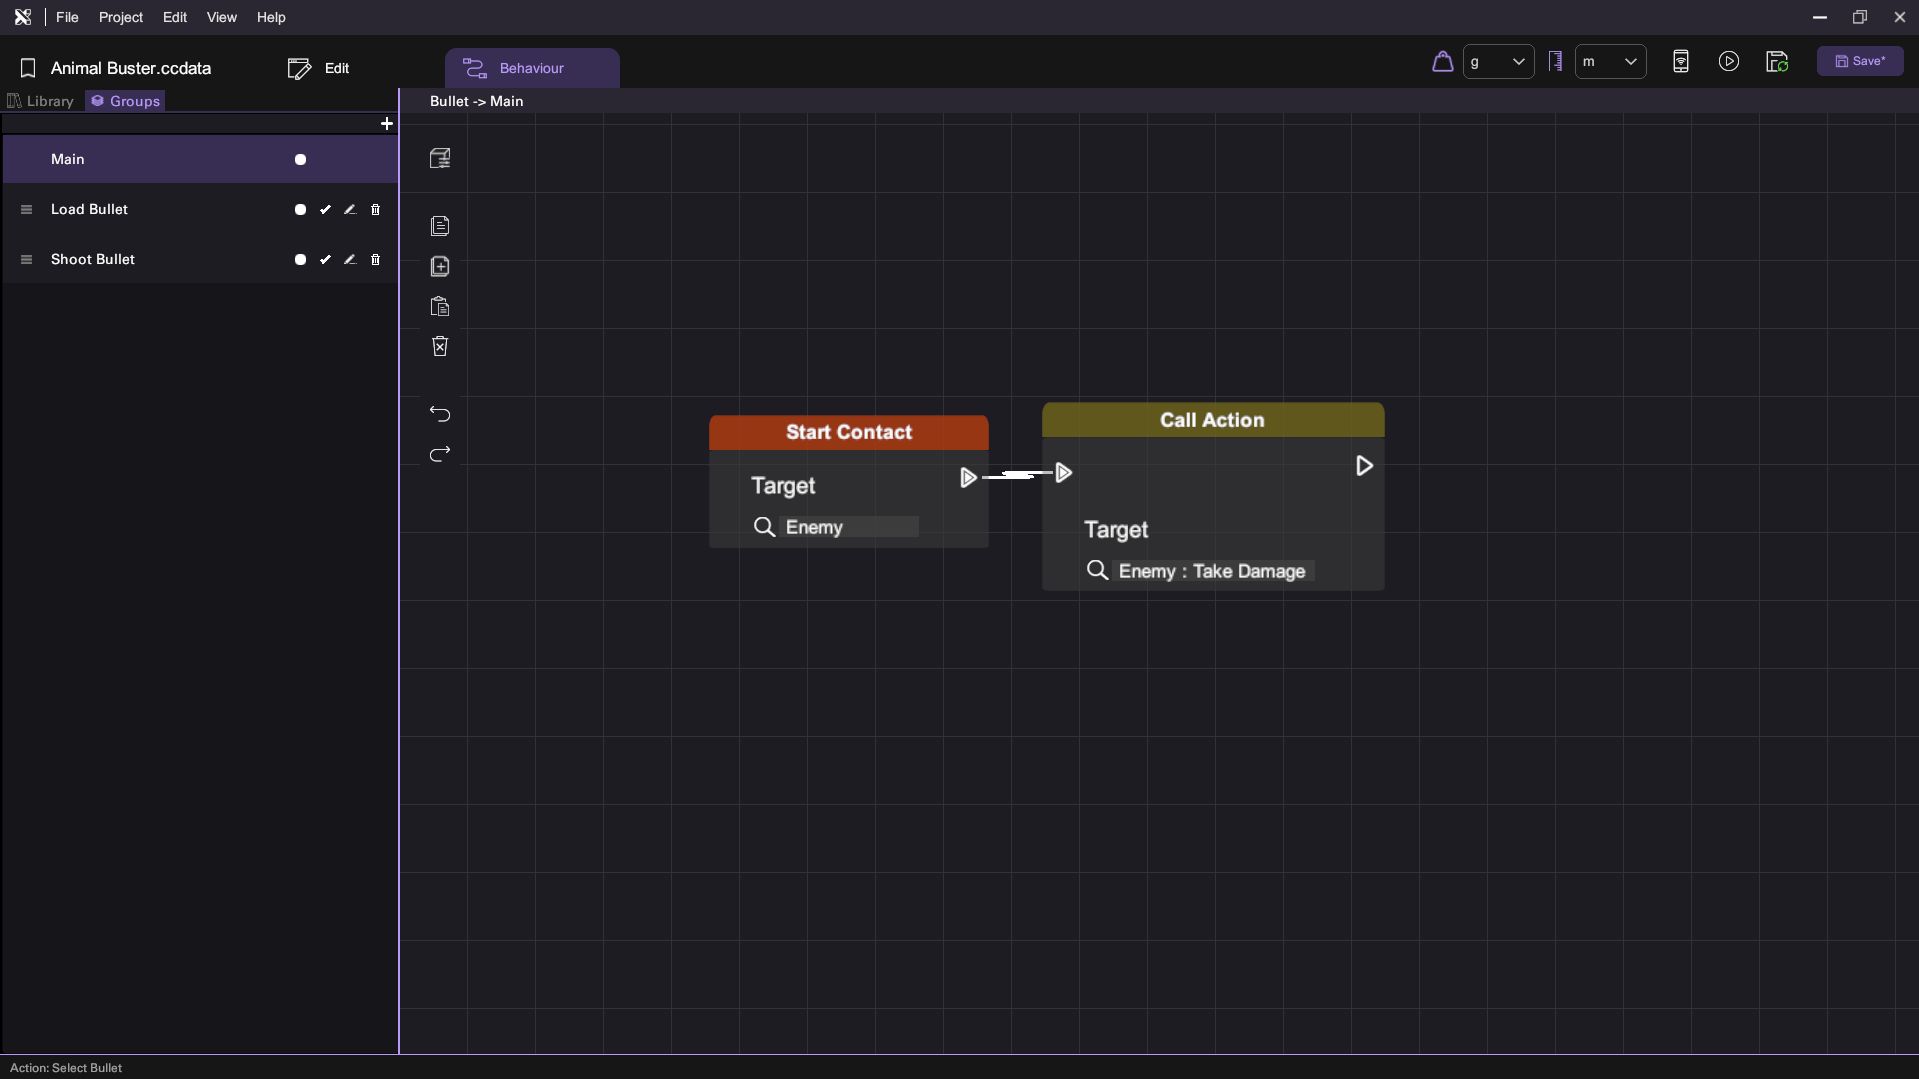
- Go to Bullet Behavior:
- Copy the behavior from the wood to the bullet to ensure it can also deal damage to the enemy.
Step 8: Add Protection to Enemy
- Open Enemy Behavior:
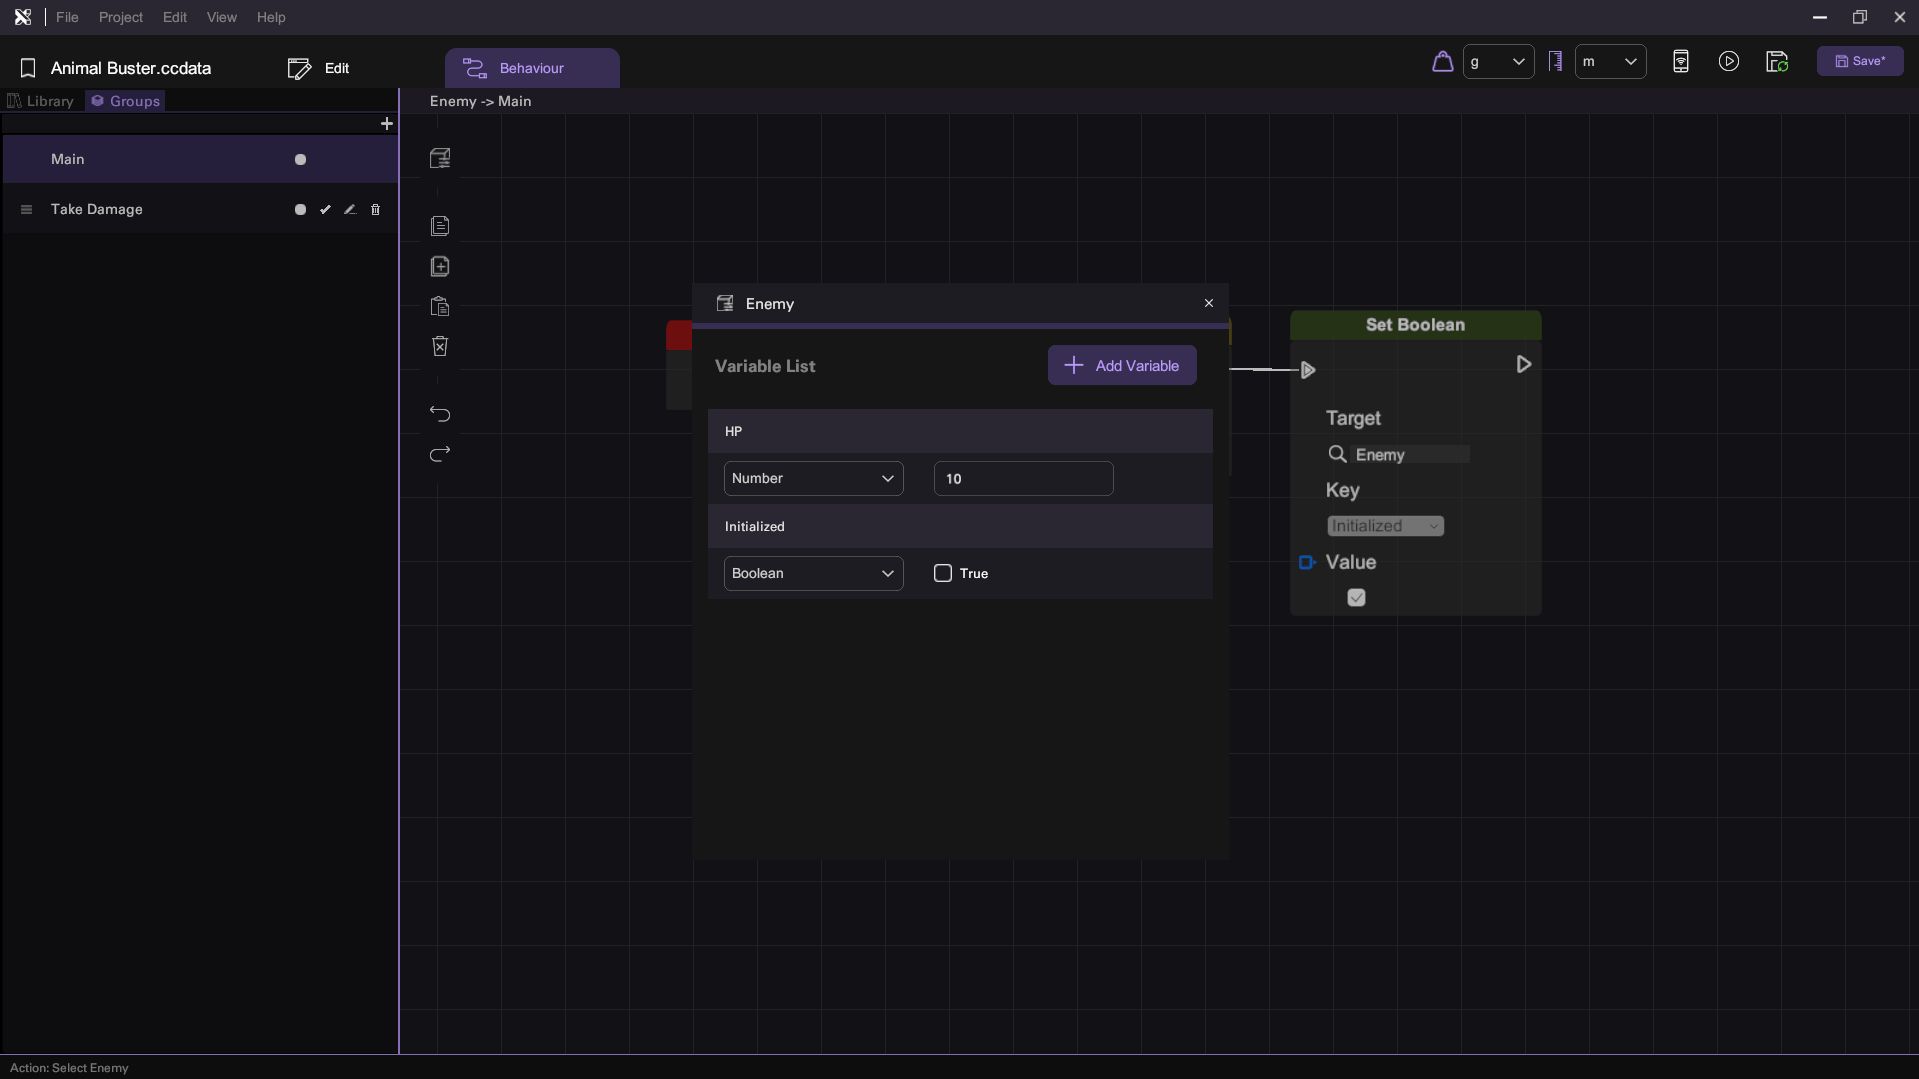
- Define a boolean variable named Initialized with a default value of false in the Variable Panel.
- Delay Initialization:
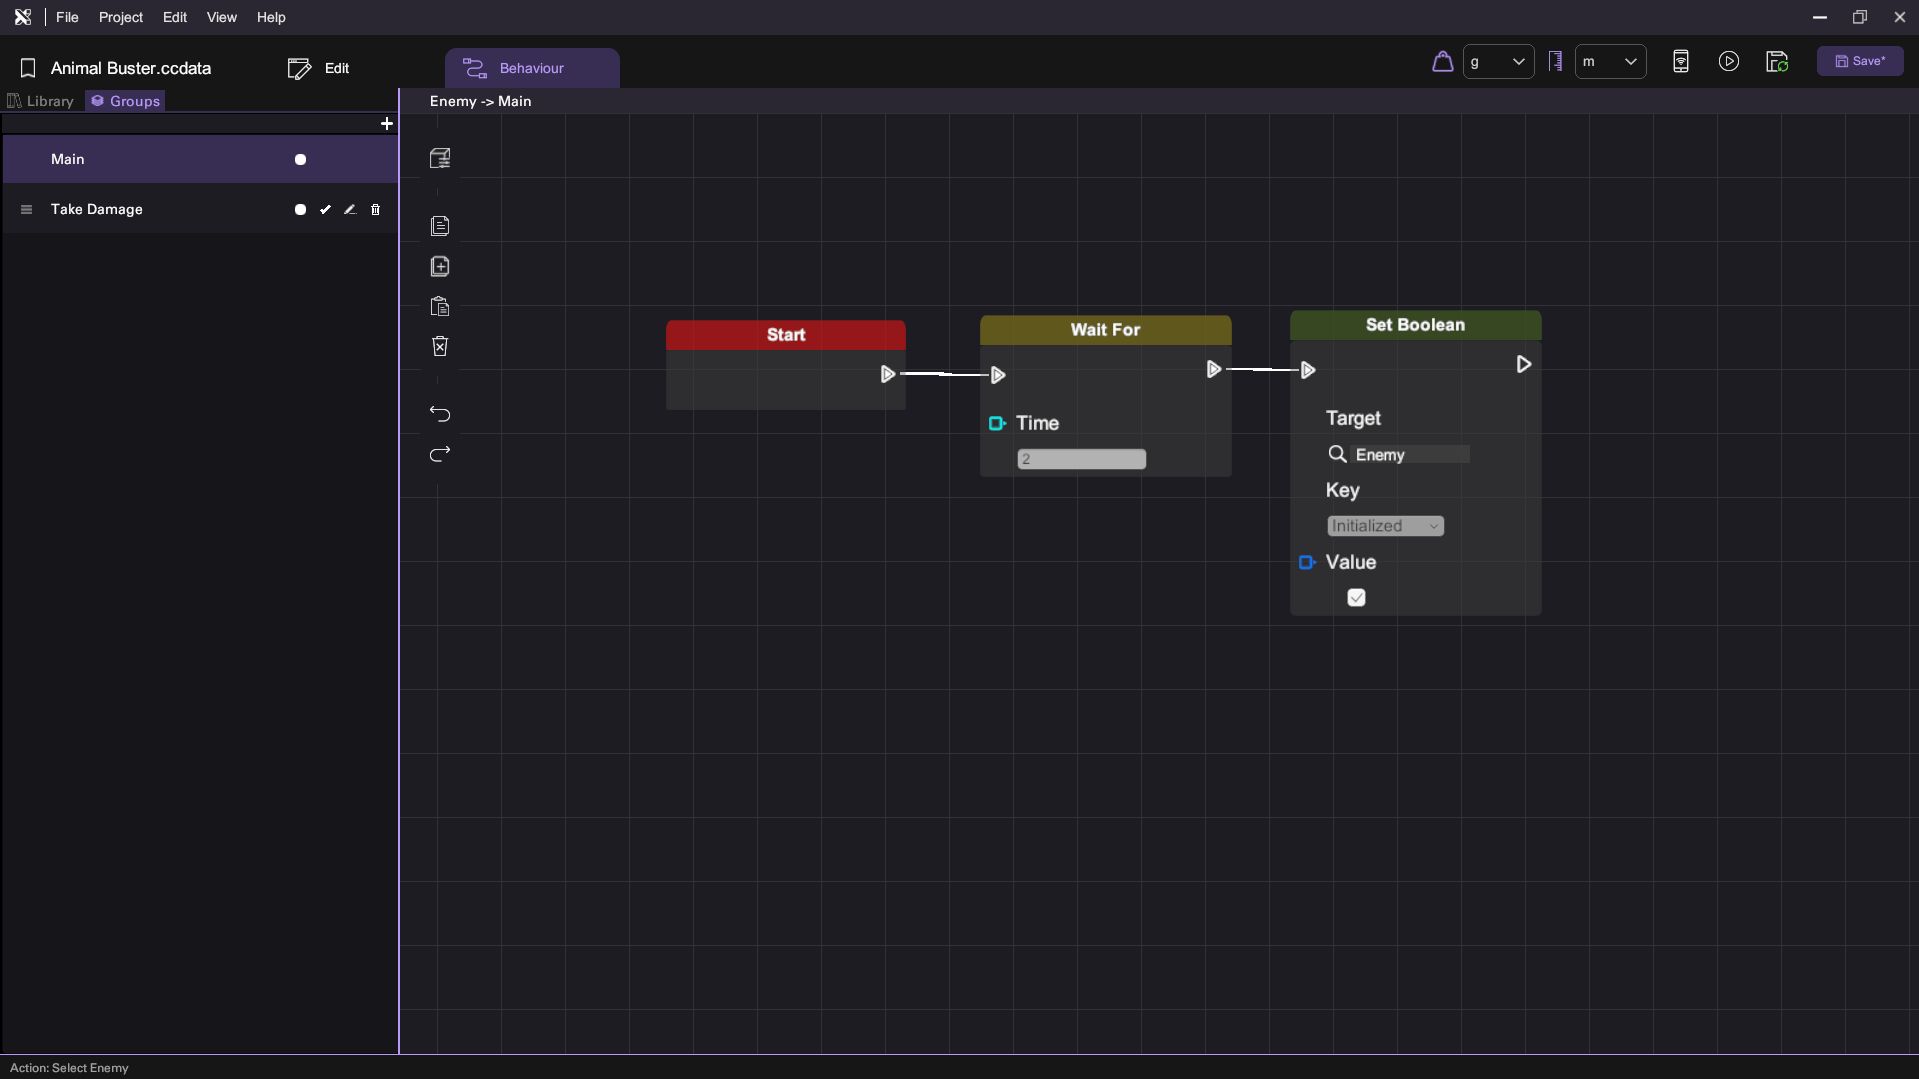
- Drag the following nodes:
- Wait For node (from Flow Control section) and set it to 2 seconds.
- Set Boolean node (from Variable section) to change Initialized to true.
- Drag the following nodes:
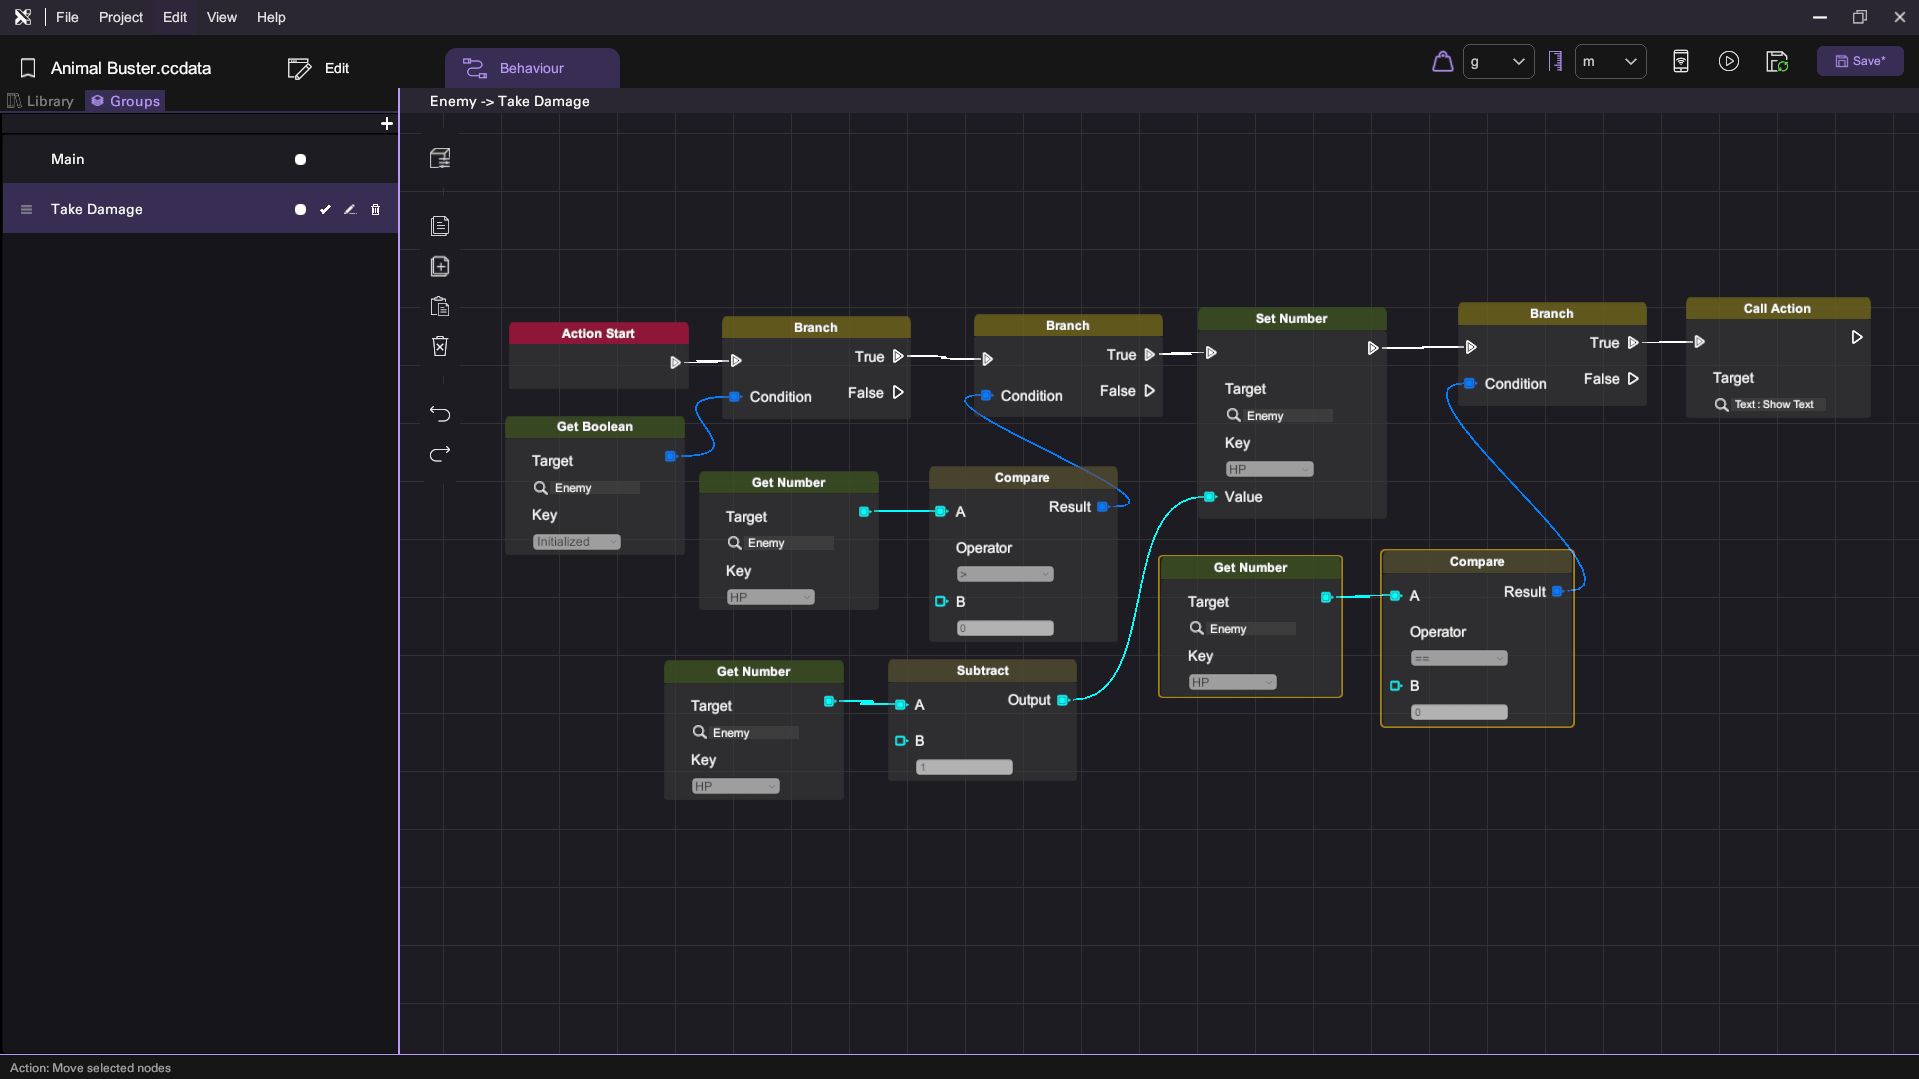
Step 9: Update Take Damage Action
- Modify Take Damage Action:
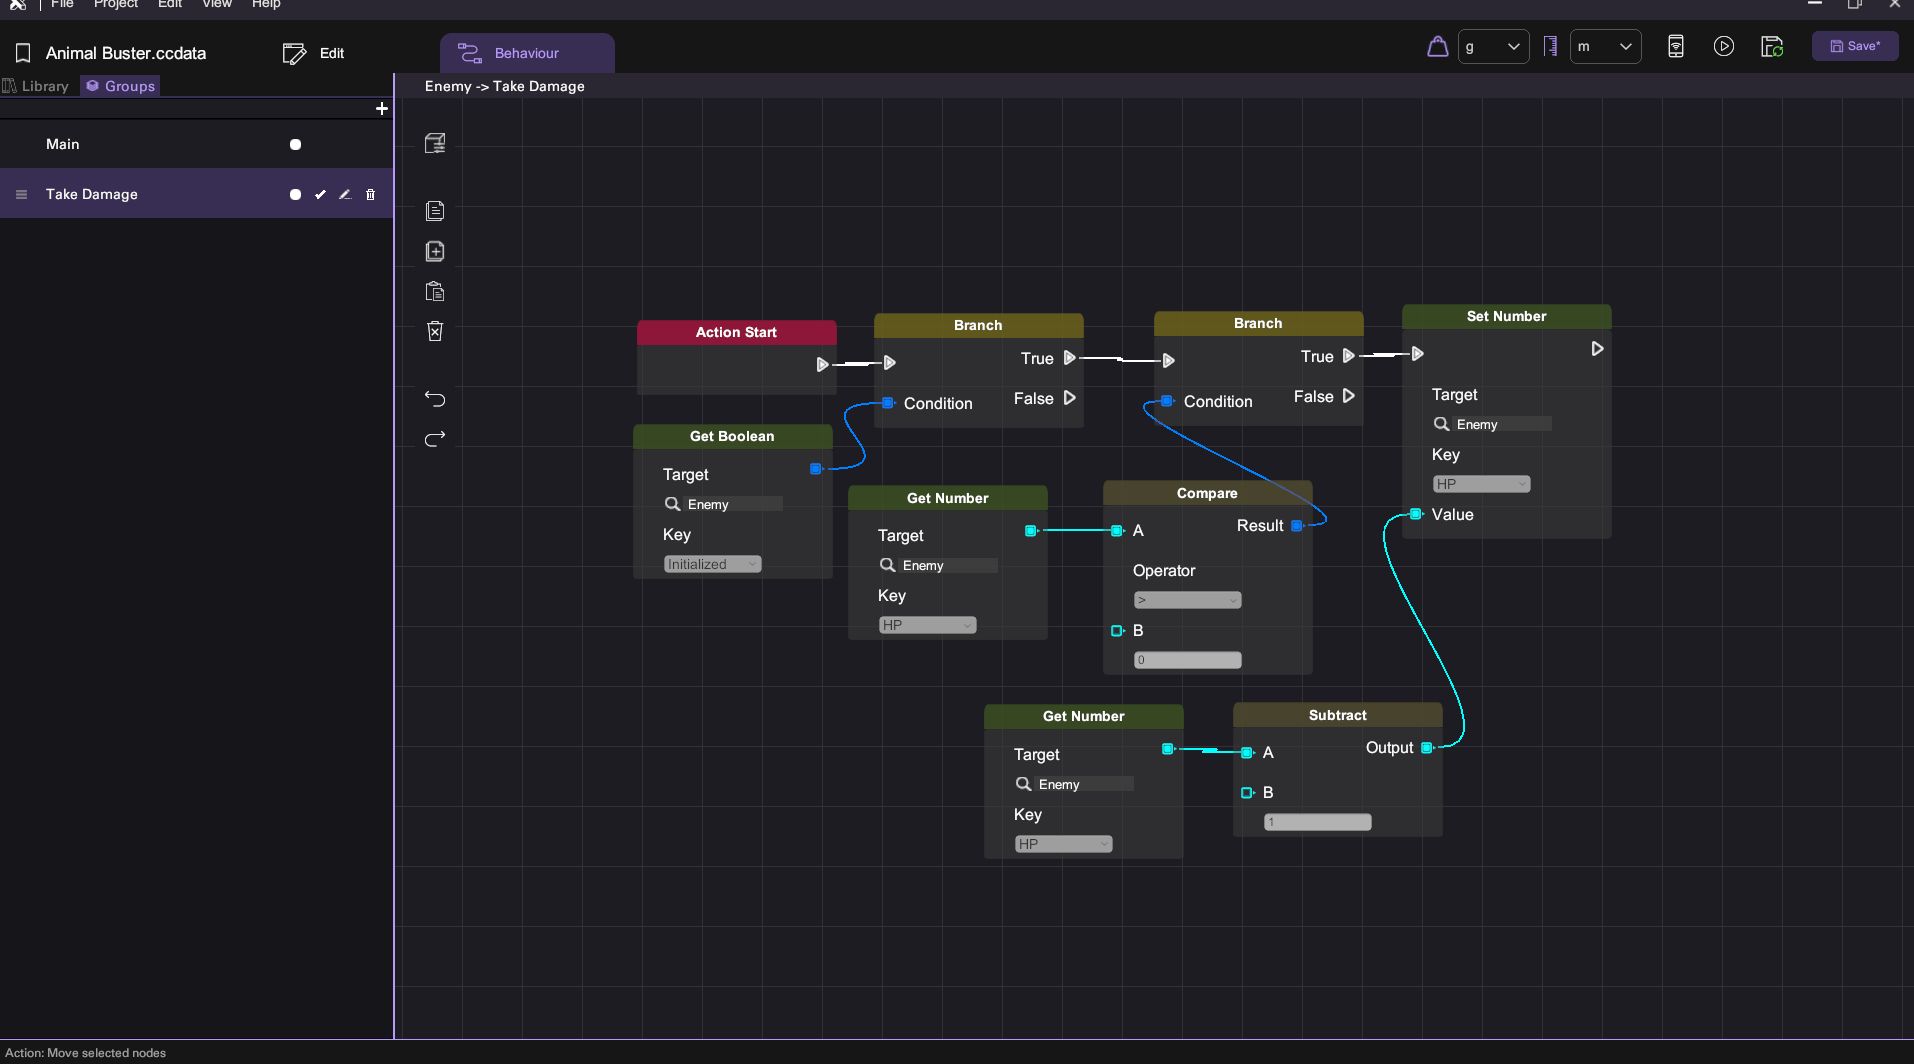
- Drag a Branch node (from Flow Control section) and a Get Boolean node (from Variable section) into the Take Damage action.
- Use these to check if Initialized is true before processing damage.
Step 10: Create Win Message
- Open the Asset Panel:
- Spawn a Text object.
- Set Text Attributes:
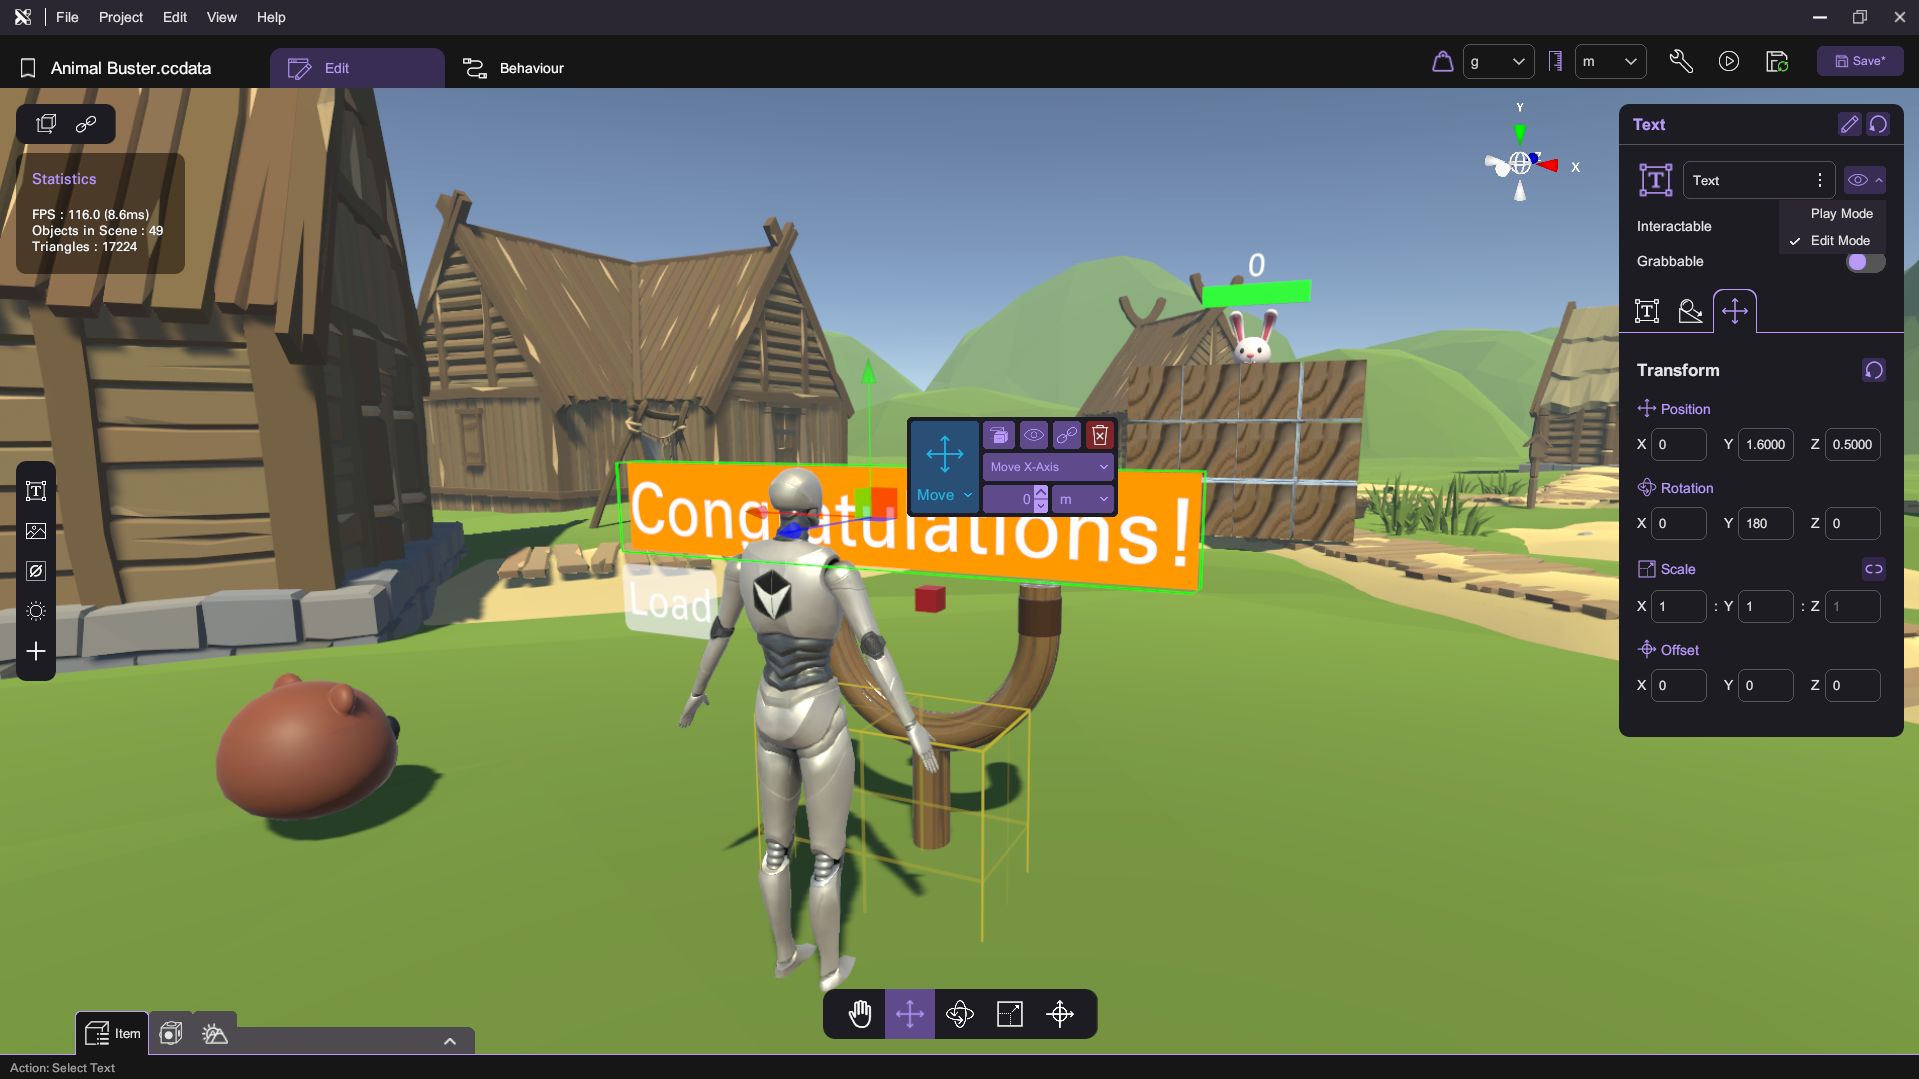
- Set the position of the Text object to 0, 1.6, 0.5.
- Set the rotation of the Text object to 0, 180, 0.
- Change the text to Congratulations
- Disable it in Play mode.
- Go to Text Behavior:
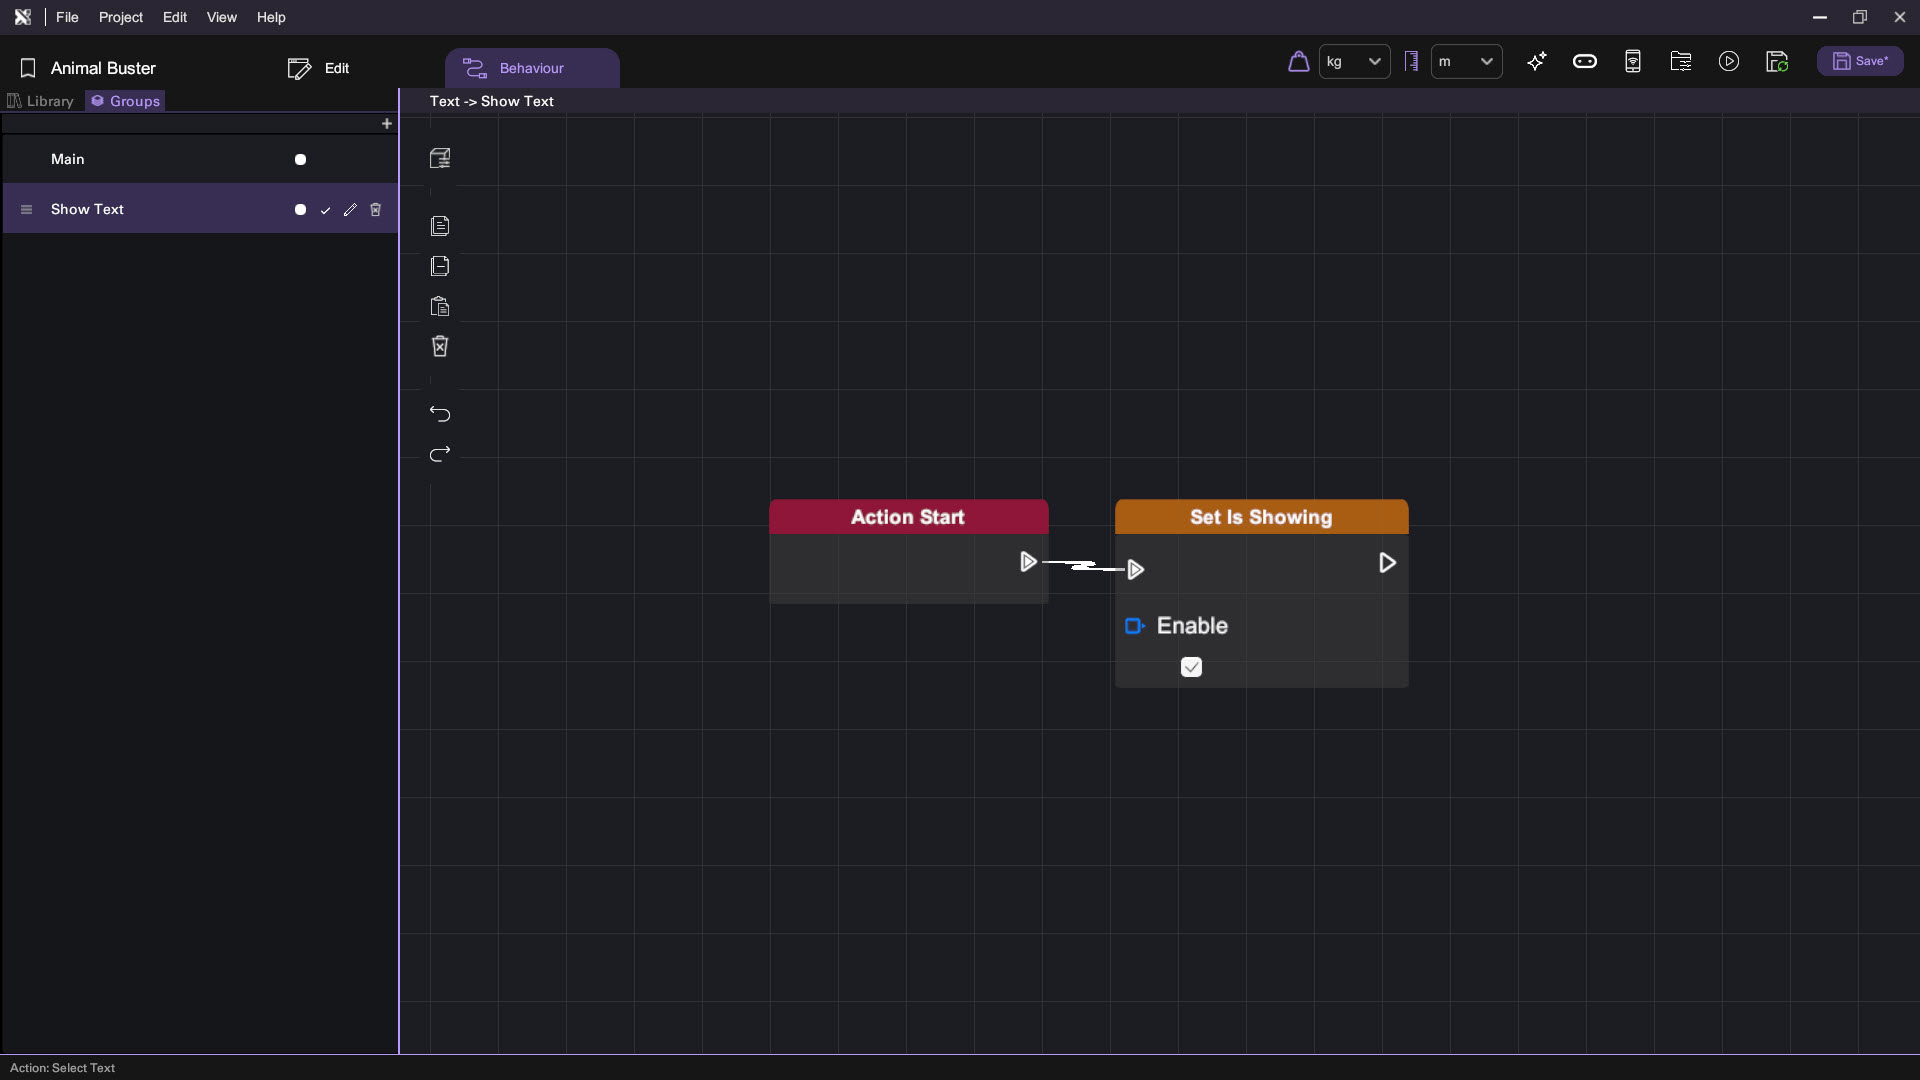
- Create a Action Show Text and drag the following nodes:
- Set Is Showing node (from Item section).
- Create a Action Show Text and drag the following nodes:
Step 11: Pop out Message
- Modify Take Damage Action in Enemy Behaviour:
- Drag the following nodes to check if HP is 0:
- Branch node (from Flow Control section)
- Get Number node (from Variable section)
- Compare node (from Math section)
- Call the Show Text action if HP is 0:
- Drag the Call Action node (from Flow Control section)
- Drag the following nodes to check if HP is 0:
Step 12: Create HP Display
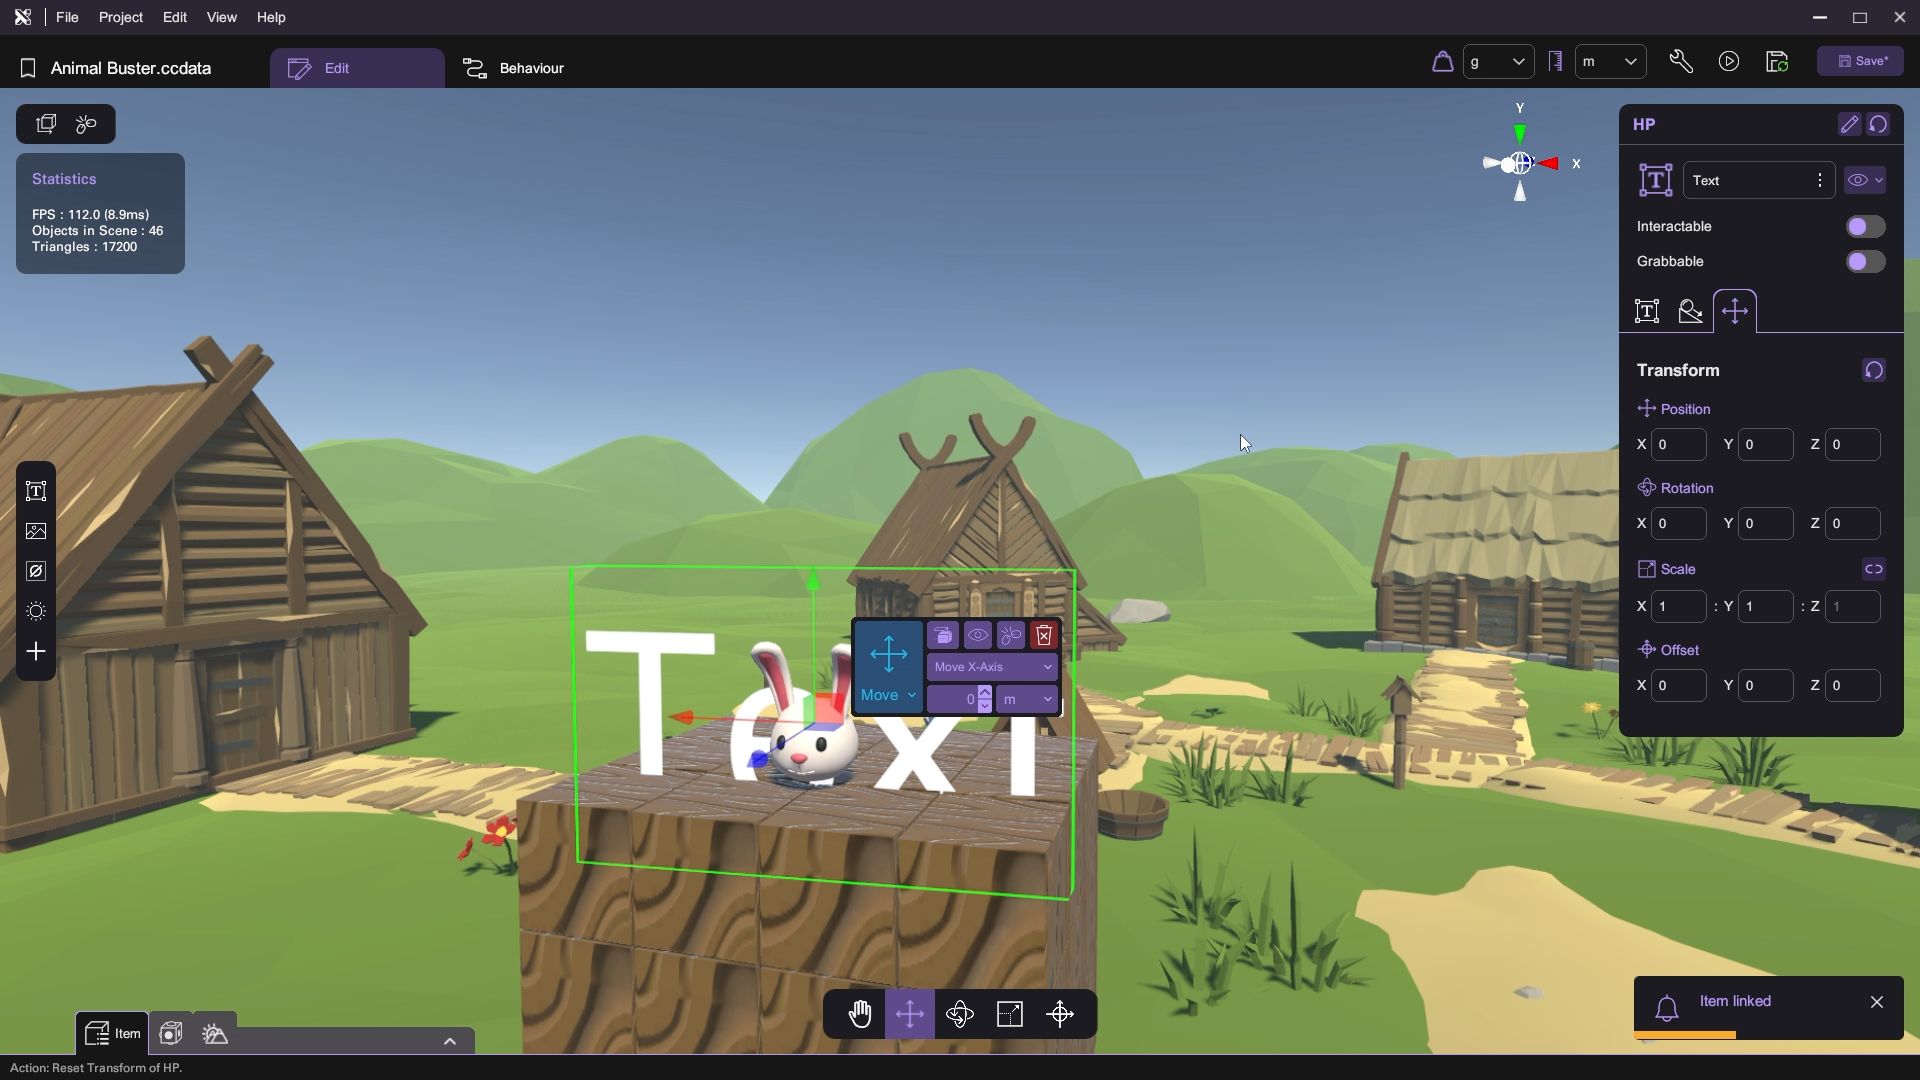
- Spawn a text object.
- Rename to HP
- Parent to the Enemy.
- Reset the transforms.
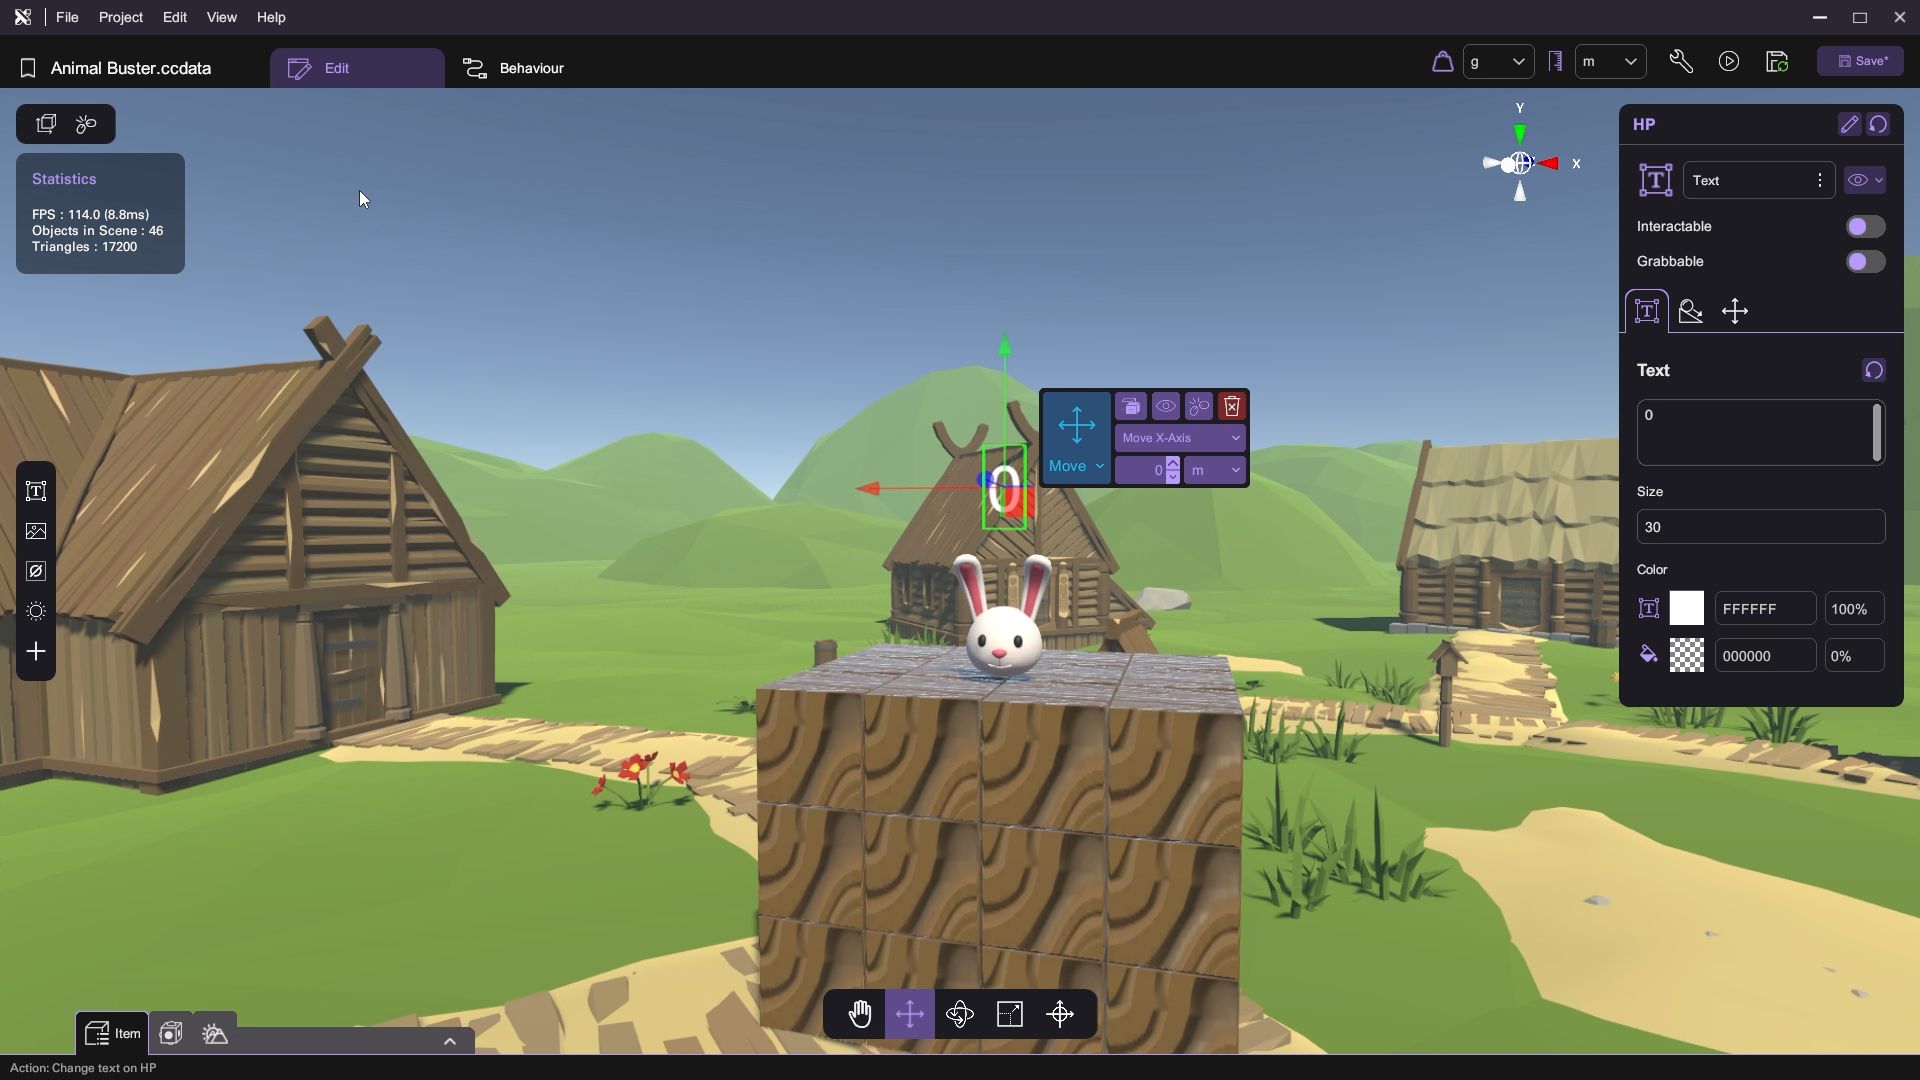
- Set Text Attributes:
- Change the text object attribute:
- Move a bit upwards.
- Set font size to 30
- Set text to 0
- Change the text object attribute:
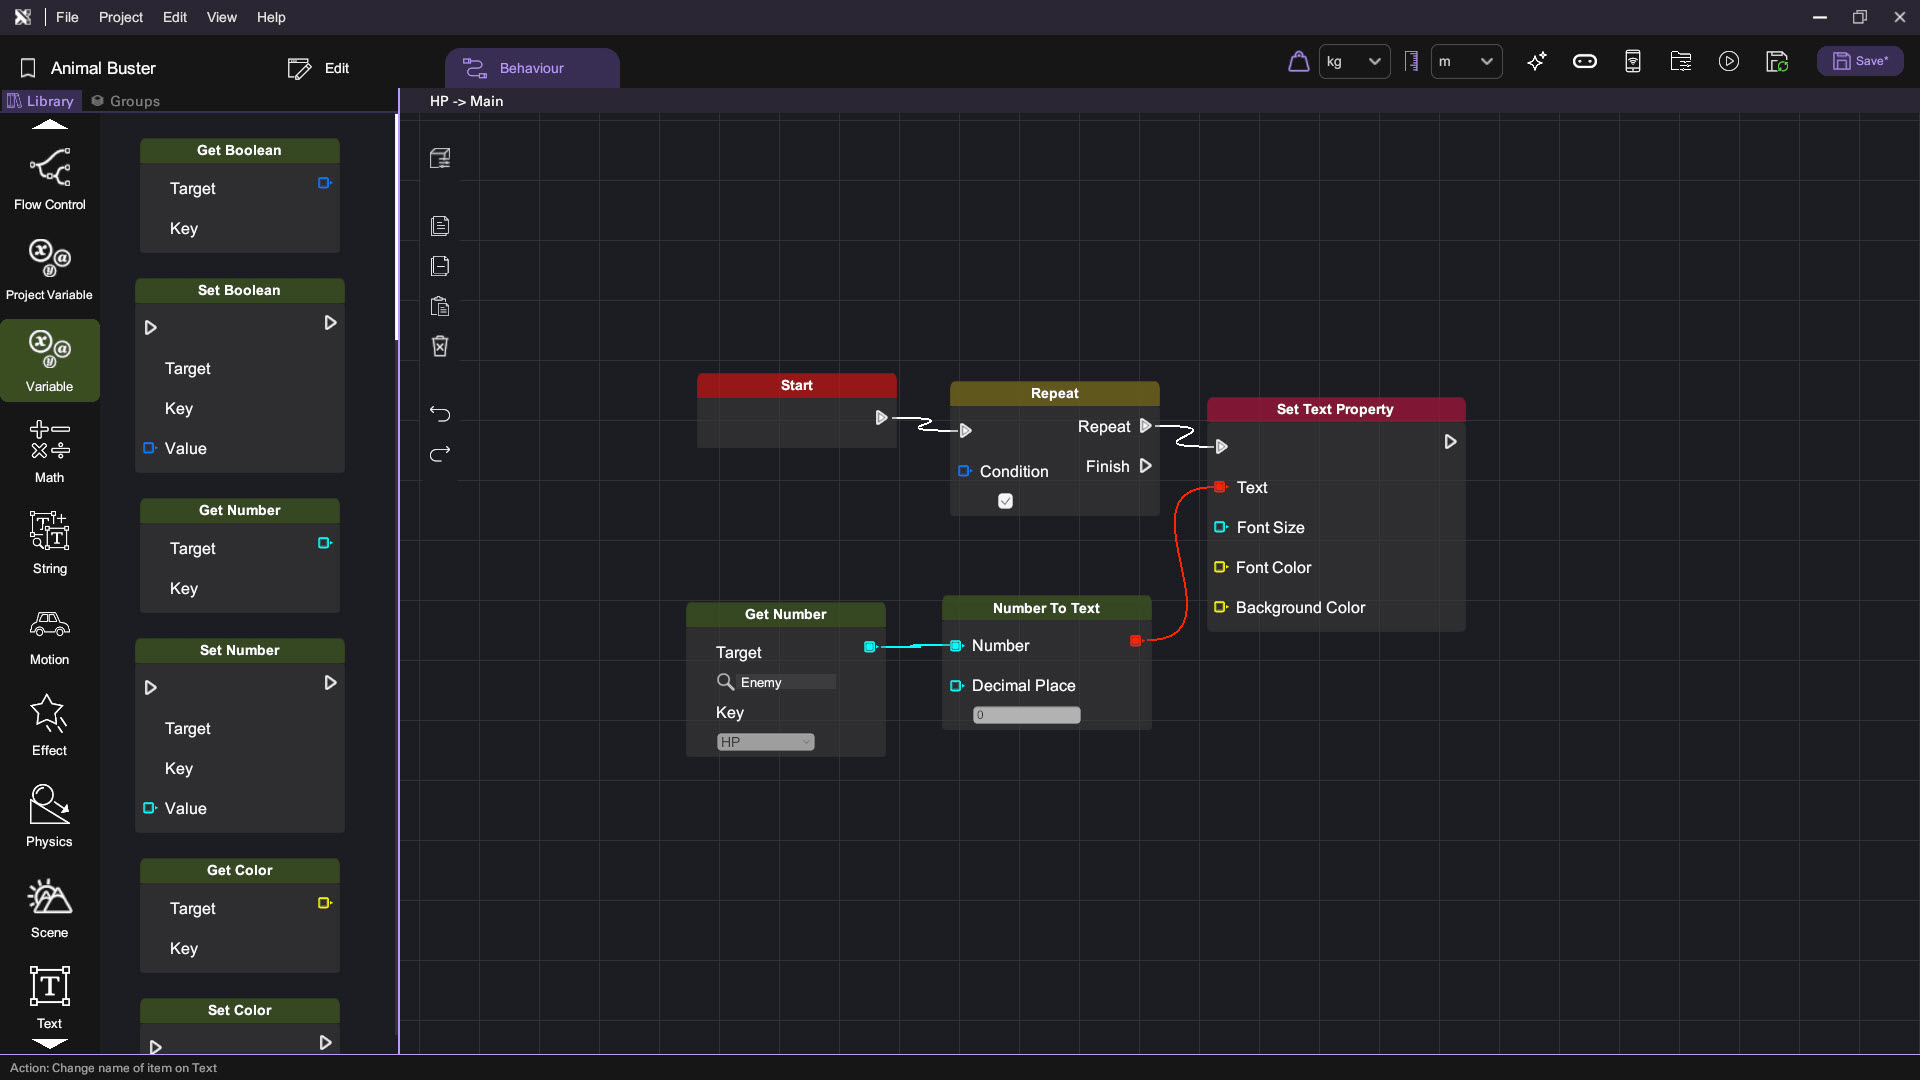
- Go to HP Behavior:
- Drag the following nodes:
- Start node (from Item Event section)
- Repeat node (from Flow Control section)
- Set Text Property node (from Text section)
- Get Number node (from Variable section)
- Number to Text node (from Variable section)
- This setup will repeatly update text with HP variable.
- Drag the following nodes:
Conclusion
Congratulations! You've successfully created the enemy and building mechanics for the Animal Buster game. You can now interact with these elements in the game scene. Stay tuned for more tutorials!